As much as I am all over power tools and DIY projects I really am a girly girl at heart. I like pamper myself now and again and using a sugar body scrub is an excellent way to do it. Sugar is as a natural exfoliate but is still gentle enough to be used on skin. The oil in the sugar scrub can protect your skin against moisture loss. Add a few natural essential oils and you have a wonderful way to make an expensive professional spa treatment from ingredients you may already have in your kitchen!
Here are four of my favorite natural sugar scrub recipes. They make great gifts too!
1.Basic Sugar Scrub Recipe
All of my sugar scrubs are based on this basic recipe. The key is to make the scrub in small batches and use it fairly quickly because it doesn’t have any preservatives in the mix.
 Ingredients
An empty jar with a lid (a small jelly or condiment jar works great for this project)
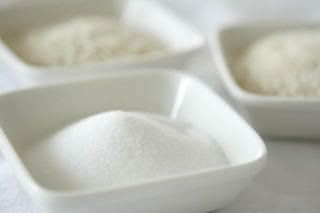
1 cup granulated white sugar
1/2 cup olive oil
Label (if desired)
Make it
1. Pour the granulated white sugar into the jar.
2. Pour the olive oil into sugar and mix thoroughly until the ingredients are well blended. (I prefer the screw on the lid and shake method to mix my ingredients.)
3. Label the jar as desired.
2. Variations for the Basic Sugar Scrub Recipe
- Oils: You can substitute sweet almond oil, jojoba or coconut oil (coconut oil may be already heavily scented and interfere with the addition of any extra essential oil or scent)

- Extra moisturizer: 1 teaspoon cocoa butter
- Natural preservative: 1/2 teaspoon vitamin E oil
- Scent your scrub using:
- A few drops of your favorite essential oil (Lavender, Jasmine, Sandalwood, etc.)
- Vanilla (A wonderful scent but it will color your scrub brown)
- Body splash or perfume (This is a great way to use up bottle of body splash or perfume that you usually don’t usually wear. However you may want to avoid this method if you don’t like items made with synthetic ingredients.)
- Color and texture: A handful of dried herbs or flowers for color (lavender, rosemary, chamomile, thyme, mint etc.)
I usually use the things that I have in my pantry – olive oil and white granulated sugar (ironically organic sugar doesn’t work very well for this project) and my suger scrub works great. Even better, it’s less expensive than the body scrub I saw in Sephora that was $32 for a small jar of plain olive oil and sugar!
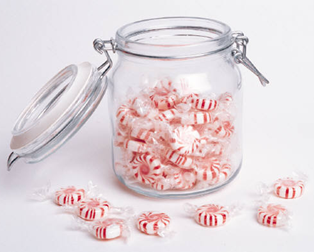
3. Peppermint Candy Cane Sugar Scrub
This one is curtsey of
Crunchy Chicken. I made her candy cane scrub and gave it to some ladies on my Christmas list last year. My mom loves it!! And she’s, shall we say,
selective about things, mmmkay? So consider that a serious stamp of approval.
 Ingredients
An empty jar with a lid
1 cup granulated white sugar
6 candy canes/peppermint candy (approx ¼ cup), finely crushed into a powder
1/2 cup olive oil (or any of the oils in the basic recipe)
6 drops peppermint essential oil (optional)
Label (if desired)
Make it:
1. Pour the granulated white sugar and crushed peppermint into the jar.
2. But the lid on the jar and shake it to mix thoroughly until the ingredients are well blended.
3. Pour the liquid ingredients into sugar mix.
4. But the lid on the jar and shake it to mix thoroughly until the ingredients are well blended.
5. Label the jar as desired.
Notes:
- If you can find it, a bag of precrushed peppermint candies for baking are excellent for this project!
- Once the candies are broken into chunks, I use my blender or food processor to further pulverize the candy into a fine powder.
- I didn’t use peppermint essential oil and my scrub still smelled very pepperminty. As always, your mileage may vary.
- The courser grains of the broken candy could do damage to delicate facial skin. It may be best to use this scrub strictly as a body scrub and not as a facial scrub.
3. Vanilla Brown Sugar Scrub aka Kahlua Sugar Scrub
After some experimenting I came up with this brown sugar scrub that smells just like Kahlua! Although I wouldn't recommend drinking it unless you like the taste of olive oil.
Ingredients 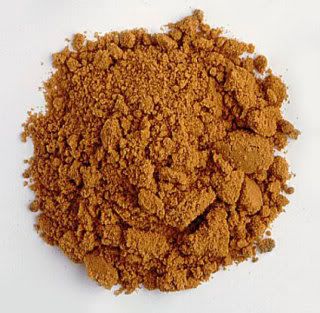
An empty jar with a lid
1/2 cup granulated white sugar
1/2 cup granulated brown sugar
1/2 cup olive oil (or any of the oils in the basic recipe)
6 drops of vanilla
Label (if desired)
Make it
1. Pour the granulated white sugar and brown sugar into a bowl and mix thoroughly until the ingredients are well blended.
2. Pour the sugar mixture into a jar.
3. Pour the liquid ingredients into sugar mix.
4. But the lid on the jar and shake it to mix thoroughly until the ingredients are well blended.
5. Label the jar as desired.
I'm going to make a few of these sugar scrubs and give them out as Mother’s Day gifts. So Mom, if you’re reading this, act surprised when you open your gift, OK?


